Editor’s note: This is a guest post from Joshua Klein.
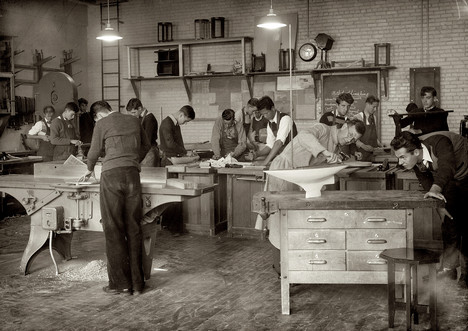
Classes in the “industrial arts” were first introduced to secondary schools in the 1880s, and for the next century, taking a course in woodworking, mechanics, drafting, and printing was a common educational rite of passage for young men.
Then, beginning several decades ago, shop classes began to be removed from secondary curriculums. With the decrease in educational funding, and increasing emphasis on standardized testing, schools began to cull electives, institute stricter graduation requirements, and focus more on college prep academics and the subjects necessary for passing state exams. There wasn’t money or time to maintain tools and sawdust-filled workshops, and one by one school districts dropped their shop classes, figuring that students who wished to pursue trade skills could do so later at a vocational college.
This demise of shop classes is quite unfortunate, as they were never solely about preparing students for trade employment. Rather, they taught all men manual skills that they could use and enjoy throughout their lives, whether they became a carpenter or a doctor. They were considered part of becoming a well-rounded man – one able to use both his hands and his mind.
Arguably the industrial arts class that is most missed is wood shop. Learning how to work with wood is not only handy, allowing you to make and fix things around the house, but allows you to satisfyingly connect with a long history of craftsmanship. Woodworking was one of the earliest skills mankind developed; the pre-industrial world was largely made of wood, and for thousands of years, all men had at least a rudimentary understanding of how to shape and manipulate it. Even up until the second half of the last century, tradesmen and professionals alike had the confidence to be able to build wooden shelves, cabinets, or even chairs for their family.
Today, in our age of plastic and factories, woodworking has transformed from a common necessary skill into something almost mysterious or awe-inspiring. Because most 21st-century consumers are used to driving to big box stores to pick up another mass-produced replacement when their desk falls apart or their chair breaks, any man today that can walk up to a lumber pile with saw and plane to shape a beautiful and enduring replacement is revered as a “true craftsman.”
Although this universal admiration of hand skill is appreciated, the truth is, woodworking is no mystery. And fortunately, even if you missed out on taking a thorough shop class in high school and feel ill-equipped to tackle a simple woodworking project, it’s definitely not too late to learn. Here’s a list of some basic skills you would do well to develop. None of these skills require expensive, dangerous machinery or exotic tools. They are the foundational skills every woodworker should know.
1. Understand How Wood Works and Behaves
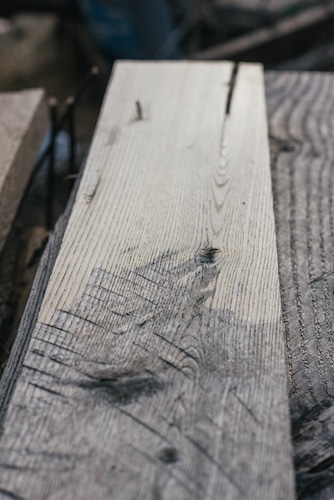
Before you put any tool to your lumber, you will need to understand its proper orientation and what direction to plane the board. As trees grow, growth ring layers continue to build on one another and this produces beautiful grain that shows in our boards. This grain can make planing it trickier if we ignore the ideal direction to work. Working wood grain is kind of like petting a cat — if you go from tail to head, you will find the hair standing straight up and might get a hissing disapproval, but if you pet “with the grain” from head to tail, you’ll find the hairs lay down nice and smooth and purring will ensue.
It’s also important to understand how wood expands and contracts as humidity fluctuates throughout the year. All wooden construction takes this natural property into account and ignorance of this can be disastrous.
2. Sharpen Saws, Planes, and Chisels
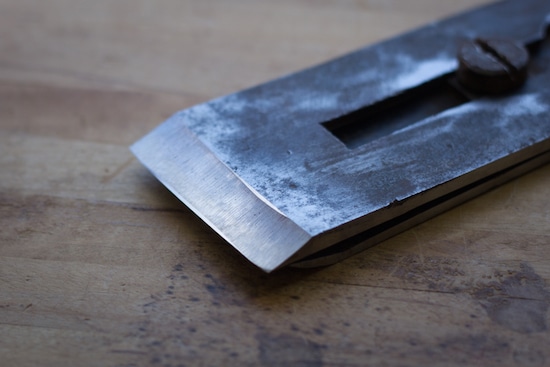
Too many people have perpetuated the myth that working wood by hand is really hard work, simply because they were using a dull tool. It is an axiom among woodworkers that in order for things to go smoothly, you have to “let the tool do the work.” If your saw requires a good amount of push to cut or if you find you need a running start to make shavings with your hand plane, you aren’t doing yourself any favors. Sharpening your tools is a basic and foundational skill because it is something that needs to happen regularly. Not only is it inefficient to work with dull tools, it’s dangerous. If you feel like you need to push your chisel with body weight to complete the cut, when it does pop free, you will lose control and your tool will stab into whatever is in its path. Learn how to sharpen your tools and you will find woodworking to be enjoyable, safe, and efficient.
3. Use a Hand Plane
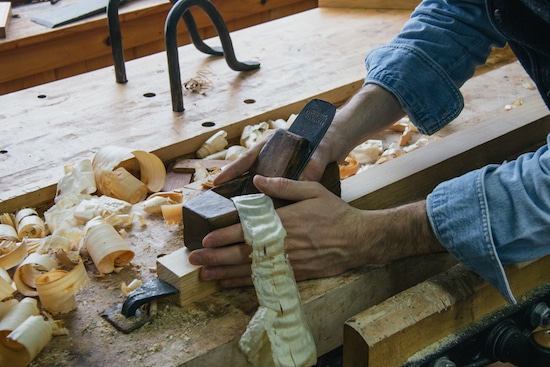
With a lot of woodworking tools, the basic technique is pretty self-explanatory. But not all of them are so intuitive. Proper use of hand planes requires a bit of instruction and practice to develop the feel of adjusting the cut from coarse to fine. Additionally, the edge can be askew or the cap iron can be in the wrong place. Although these things require a little bit of research to figure out, properly using a hand plane is an undeniably attainable skill. I encourage you to grab an old plane and hop on YouTube to search “tune up an old hand plane” or “how to use a hand plane.” There will be more than enough hours of video to make up for what you missed in shop class.
4. Prep Lumber With Hand Tools
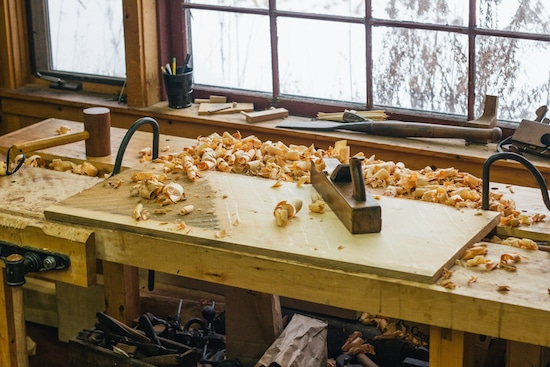
Maybe you have a tablesaw and a 13” thickness planer already, but most of us don’t. Be careful not to fall into the trap of feeling like you have to buy expensive machines to build things. When I work with wood, I use only hand tools and love every minute of it. If you learn how artisans worked their lumber before machines dominated the furniture industry, you will find woodworking by hand to be efficient and viable. There are many tried-and-true techniques to expedite the process that free us from feeling like we have to do machine-perfect work by hand. The real key is to use the right tool for the job: coarse tools for coarse work and fine tools for fine work. Still not convinced? Check out my good friend Jim’s story. I hope it inspires you.
5. Cut a Mortise and Tenon Joint
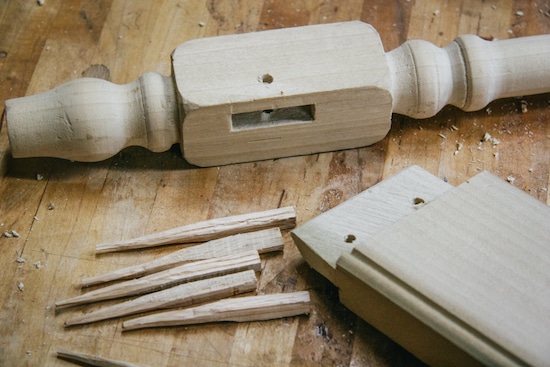
This is the most fundamental joint in all wood construction. Whenever we have to join a horizontal member (like a chair rail) to a vertical member (like a leg), we need to interlock these pieces at a right angle. By fitting a tenon into a corresponding mortise (hole), we can create a solid 90° joint. Although it may look intuitive to make, achieving a nice, tight fit requires careful technique and practice. There are many ways to make a mortise, but I use a stout chisel designed for that task and simply determine the width of the tenon based on that chisel’s dimension. Cutting the tenon is usually a matter of four straight saw cuts. When you do learn how to lay this joint out properly and cut it to a snug fit, the world of woodworking opens up to you. At that point, you know all the joinery required to build most tables and chairs.
6. Cut Dovetail Joints
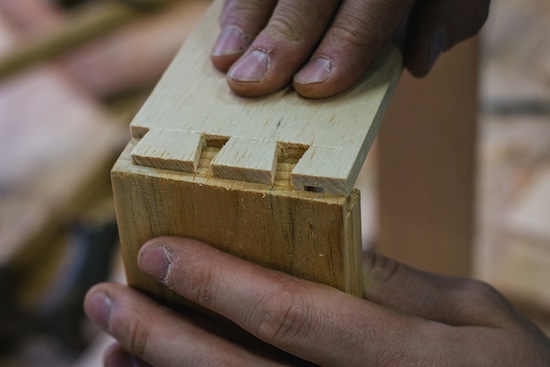
But what if you want to make a box? The revered (and overly-mystified) dovetail joint is a very strong way to join corners of boards. Of all features that non-woodworkers admire today, the dovetail joint is the one that creates the most awe. It is composed of one side cut into wedge-shaped “tails” that mate into corresponding “pins.” When fitted together, the wedge shape prevents the boards from sliding apart in one direction. This joint has been very standard construction since the 1700s. Never meant to impress, it was usually intentionally hidden behind veneer, molding, or paint so that no one would have to look at that “ugly” joinery. It wasn’t until the arts and crafts movement that visible joinery was considered an aesthetic asset. Today, making dovetail joints has become a litmus test for serious woodworkers, but don’t let this scare you away from trying it. Check out a few of the four million “How to Cut Dovetails” videos online and then get into the shop. It’s much more straightforward than people think: Cut tails. Trace the tails on the other board. Then cut out the waste you traced. That’s pretty much it. All the fine tuning is just practice.
7. Finish Your Furniture
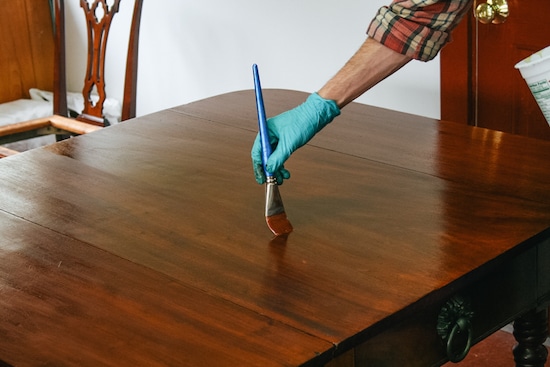
After investing a number of weekends building a nice table or chest, how are you going to finish it? Finishes beautify and protect the piece you’ve worked so hard to build so don’t cop out and do the “rub it with oil” thing. There are so many beautiful finishes that become second nature to work with. I use shellac 99% of the time. Once you get the feel down, it’s really quick to apply, very forgiving, easily repairable, and you never have to clean a brush (because it re-softens in alcohol)! There are other varnishes that provide good protection for outdoor use as well. I recommend picking up a good starter book, like Jeff Jewitt’s Hand Applied Finishes. It is simple and straightforward, without getting too far into minutiae.
One of my mentors started out as a cabinetmaker who loved working wood but dreaded getting to the finishing part. He started doing some digging to learn more about it and became so addicted to the process that nowadays he loathes having to build anything because all he wants to do is the finishing! I promise that if you give a little energy to learning how to properly finish your work, your enjoyment of the finished piece will be dramatically increased. These final touches are enough to inspire you to take on another project.
Joecgp
Rabu, 27 Maret 2019
0 Response to 7 Skills You Should Have Learned in High School Wood Shop
Posting Komentar